How to restore old photos, step by step
Every family has the box: prints going orange in an attic, a wedding album with water spots, the one good picture of a grandparent that's too blurry to frame. Restoring them used to mean paying a studio $30–100 per photo. Today you can do the most important part yourself, in minutes, for free. This guide covers the whole journey: scanning, repairing, upscaling, and archiving so you never have to do it twice.
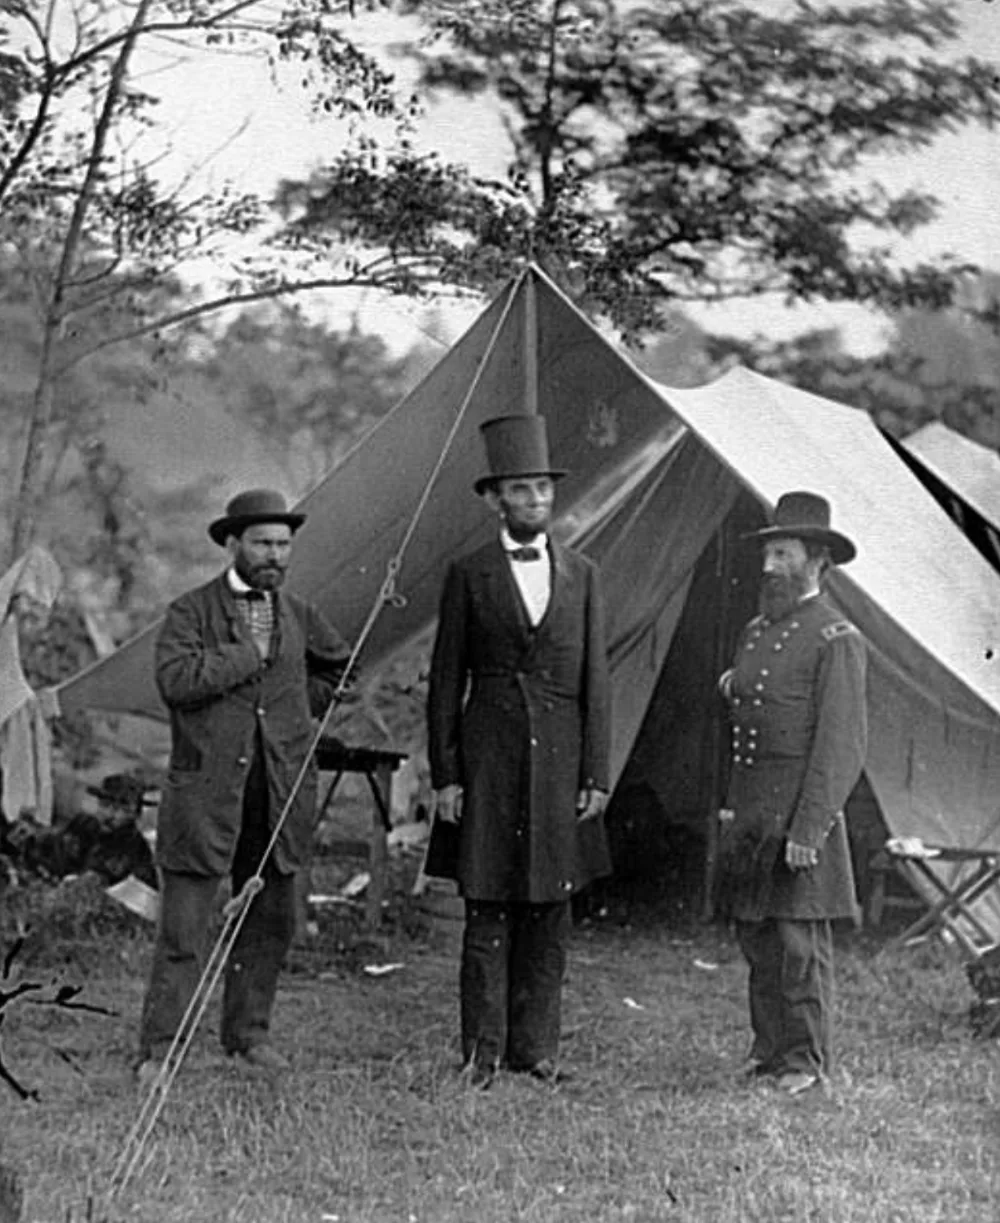 Before
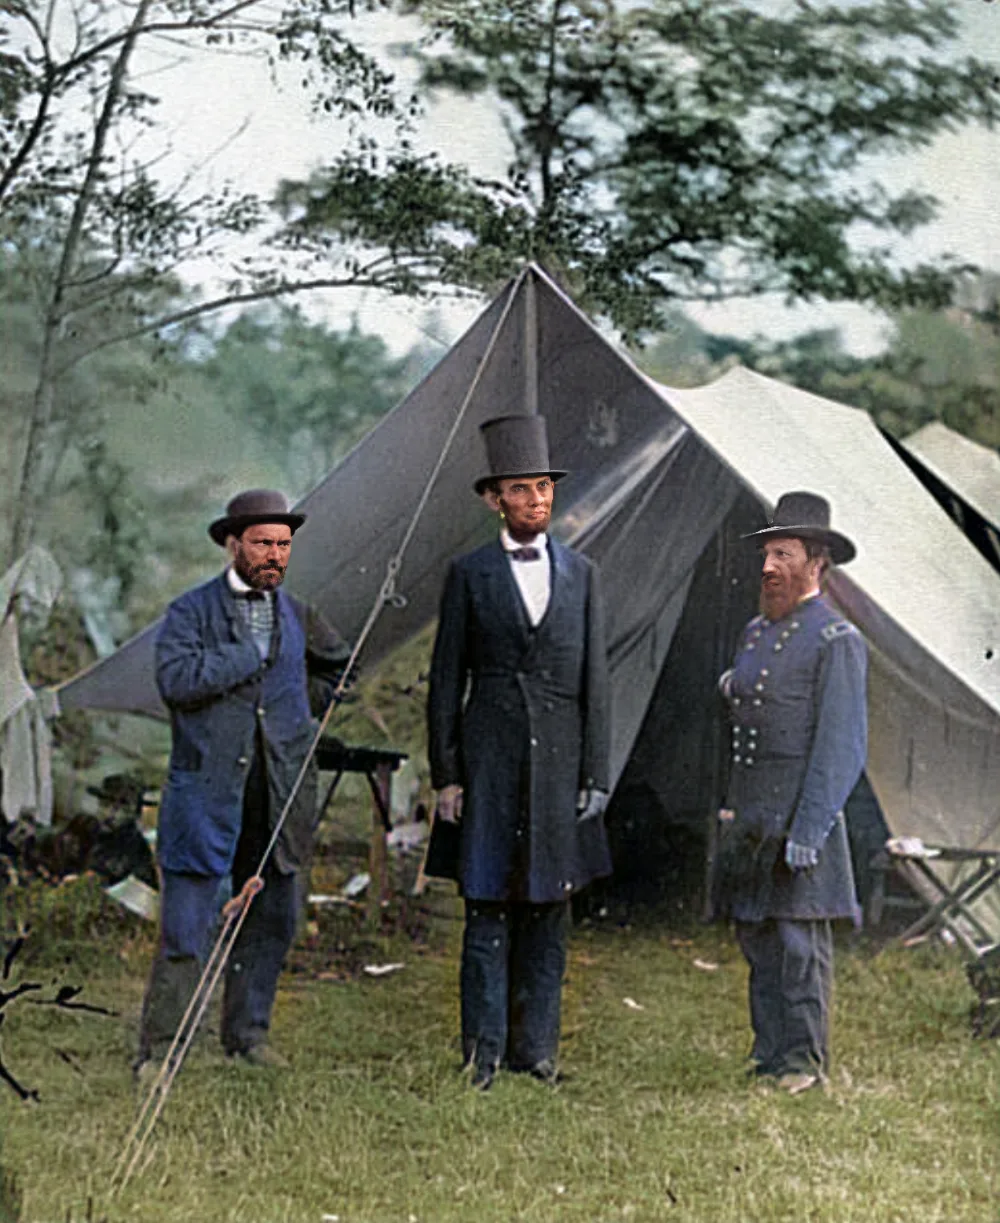 After
AfterStep 1: Digitize the print properly
Restoration can only work with the detail you capture, so this step matters more than any software. A flatbed scanner at 600 DPI is ideal for standard prints (1200 DPI for small wallet photos). No scanner? A phone camera works surprisingly well if you follow three rules: shoot in bright, even, indirect daylight, never with flash, which creates a glare stripe; hold the phone parallel to the photo so the image isn't skewed; and fill the frame, then crop later. Wipe dust off the print with a soft dry cloth first; a second of cleaning saves minutes of repair.
Save scans as PNG or maximum-quality JPEG. If your scanner offers “auto-enhance,” turn it off: those filters smear exactly the detail AI restoration needs.
Step 2: Repair the faces (and the rest)
Faces are what you actually care about in a family photo, and they're also what modern AI restores best. Face-restoration models were trained on millions of portraits; they recognize the structure of a human face under the blur and rebuild it: eyes sharpen, skin texture returns, expressions come back.
The restoration tool on our home page does this automatically: it finds every face, aligns each one, runs restoration, and blends each repaired face back into the photo, while a separate enhancement pass rebuilds the whole image in higher resolution, so backgrounds and clothing sharpen too, not just faces. Depending on capacity it runs on our servers (photos processed in memory and deleted the moment the result returns) or entirely in your browser; both are free and automatic. Two practical notes: a face turned sharply away from the camera may be skipped (restoration works on what can be recognized as a face), and a face smaller than about 40 pixels can be made cleaner but not faithfully sharp, a physics limit we've measured.
Step 3: Repair physical damage
Tears, creases, and scratch webs in the emulsion are a different problem from blur, and sharpening alone makes them worse: a crack is an edge, and enhancement crisps edges. The tool has an opt-in “Repair scratches & tears” option (beta): it detects damaged pixels first, fills only those regions, and leaves every undamaged pixel untouched; we've published the measurements. It runs before everything else so cracks are never sharpened or tinted. For severe damage (missing corners, mold, a tear through a face) a human retoucher still wins; work on a copy, never your only scan.
Step 4: Get enough pixels for printing
A 4×6 print scanned at 600 DPI gives you roughly 2400×3600 pixels, fine for screens, but if you want to print an 8×10 or crop in on one person, you'll run out of pixels. AI upscaling rebuilds plausible detail instead of stretching what's there. The Enhance treatment does exactly that as part of every restoration: the whole frame goes back through a super‑resolution model and comes out with its long edge rebuilt up to 2560 pixels, so a 1000×1500 crop returns near 1707×2560, recovered detail rather than interpolation. Beyond that the honest answer is the scanner, not the model: re‑scan at a higher DPI and you keep detail that was really on the paper. When the print is all you have and it needs to go poster-size, a paid cloud upscaler such as Higgsfield Upscale rebuilds it up to 16× for large-format printing.
| Print size | Pixels needed (300 DPI) | Typical fix |
|---|---|---|
| 4×6" | 1200×1800 | Scan alone is usually enough |
| 8×10" | 2400×3000 | Scan + restoration |
| 16×20" | 4800×6000 | Scan at 1200 DPI, then restore |
| Cropped portrait from a group shot | varies | Re-scan the print at high DPI, then crop and restore |
Step 5: Handle colour
Orange-shifted 1970s prints, green-cast Polaroids, and faded Kodachrome are colour problems, not detail problems. For casts, most photo apps' one-tap “auto color” does a decent job; for careful work, adjust the white balance until something you know is neutral (a white shirt, gray pavement) looks neutral. Black-and-white and sepia photos can be colourised automatically during restoration; the colour is an estimate, added in a way that can never alter the underlying detail, and you can switch the Colorize treatment off before you start if you prefer the original.
Step 6: Archive so you never do this again
Keep three versions of every photo: the raw scan (never edited), the restored version, and a print-ready upscale if you made one. Store them in at least two places: a local drive and one cloud or a second drive kept elsewhere. Name files so future-you can find them: 1974-flagler-beach-grandma-rose.png beats scan0047.png. If the photos matter enough to restore, they matter enough to back up.
What about paid restoration services?
Professional retouchers are worth it for museum-grade damage: a portrait torn through the face, mold, fire damage. For the ordinary box of faded family prints, AI restoration plus a careful scan now gets you most of the way for free. Be wary of “free” online tools that watermark the result or charge at the download step. Ours doesn't: no watermark, no signup, no resolution cap, and photos are never stored; the privacy page spells out exactly what happens to them in each processing mode.
Want the science? The engineering notes measure all of this
Every claim this guide makes about the tool has a measured write-up behind it, with published data, charts, and citations to the underlying papers: whether AI upscaling actually beats bicubic (a 28-image benchmark; it loses 1.07 dB of PSNR and wins everything perceptual), what face restoration keeps of the person (measured with face-recognition embeddings), how the tool decides a photo is black-and-white (115-photo evaluation, sepia included), how small a face can be found, and whether tear repair is real. If you like numbers with your nostalgia, start there.
Quick answers
Common questions (is it really free, what about privacy, which photos work best) are covered on the FAQ page. The short version: yes it's free, photos are deleted the moment they're repaired, and scanned prints with visible faces restore best.